


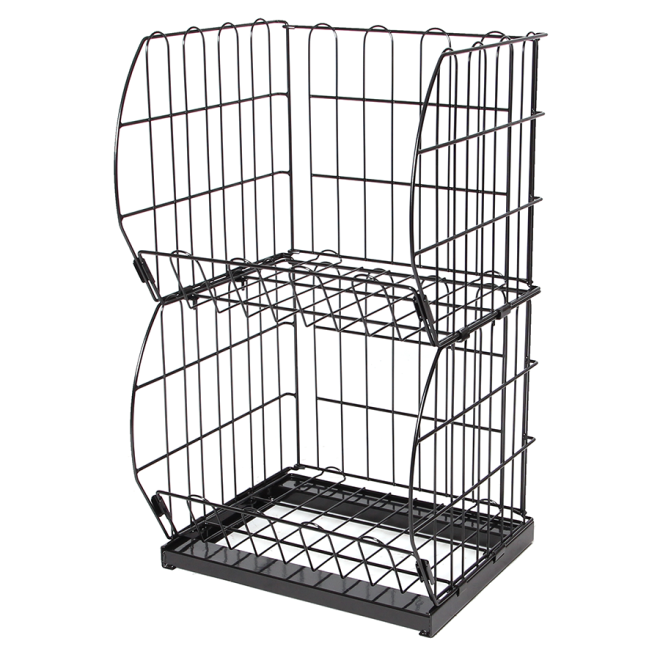
Ever tried installing metal retail shelves and ended up with a wobbly monument to confusion, three “extra” bolts, and instructions that look like ancient code? Don’t worry, your shelves don’t have to double as modern art.
This guide breaks installation into clear, simple steps so your shelves stand straight, stay safe, and pass any inspection. For safety and load standards, we also reference OSHA’s retail storage guidance here: OSHA Storage and Stacking Guide.
🧰 Measuring Store Layout and Choosing Suitable Shelf Dimensions
Accurate measurements help you place metal retail display shelves without blocking traffic flow or exits. Plan carefully to improve product visibility and safety.
Sketch your store layout, mark doors, windows, and power outlets, then choose shelf dimensions that match your product size, weight, and customer reach.
1. Map Key Zones and Customer Paths
Divide the floor into entrance, feature, and checkout zones. Keep aisles wide enough so carts and customers can pass without bumping into shelves.
- Main aisles: aim for at least 1.2–1.5 m width.
- Secondary aisles: slightly narrower, but still easy to walk.
- Leave clear space near doors and checkout counters.
2. Match Shelf Height to Product Type
Use lower shelves for heavy or fast‑moving items and taller units for light goods. Keep key products within comfortable eye and hand level.
| Product Type | Ideal Shelf Height |
|---|---|
| Heavy boxes | Lower tiers (under 1.2 m) |
| Impulse items | Eye level (1.2–1.6 m) |
| Back stock | Top shelf (over 1.6 m) |
3. Plan for Specialty Displays
For feature zones, mix standard shelving with focused fixtures such as a Metal Display Tray with Acrylic Organizer – Retail Countertop Stand to highlight small premium products.
- Place trays near checkout or service counters.
- Use clear acrylic to keep items visible and tidy.
4. Allow Flexibility for Seasonal Changes
Choose adjustable shelves and modular systems so you can reset layouts quickly for promotions or seasonal goods without major construction.
- Use adjustable brackets and shelves.
- Keep spare panels and hooks in storage.
🪚 Floor Preparation and Wall Reinforcement Before Shelf Installation
Prepare the floor and walls so metal display shelves sit level and secure. This reduces tipping risk and extends fixture life.
Check for moisture, cracks, and weak drywall. Fix problems before loading shelves to support heavy products safely.
1. Inspect and Level the Floor Surface
Walk the area, look for slopes, and use a level tool. Fill low spots and repair cracked tiles before placing heavy units.
- Use shims only for minor corrections.
- For big slopes, use self‑leveling compound.
2. Check Wall Structure and Stud Locations
When you mount shelves or braces, find studs or solid masonry. Avoid anchoring only to weak drywall or thin panels.
| Wall Type | Recommended Anchor |
|---|---|
| Stud wall | Wood screws into studs |
| Concrete/brick | Masonry anchors and bolts |
| Drywall only | Use heavy‑duty toggles with care |
3. Moisture and Load Risk Analysis (ECharts Bar Chart)
Use simple data checks to plan reinforcement in high‑load zones such as beverage aisles and stock walls. Visual tools help you see risk more clearly.
4. Prepare Power, Lighting, and Special Zones
Plan wiring routes and lighting above displays such as a Foldable Iron Wine Floor Display Rack – 12 Bottle Store Fixture to avoid cords on the floor and dark product areas.
- Run cables behind or under fixtures.
- Use warm lighting for wine and premium goods.
🔩 Step‑by‑Step Assembly Tips for Stable Metal Retail Display Shelves
Follow a clear sequence when building metal retail display shelves to prevent misaligned frames, loose bolts, and unsafe weight distribution.
Lay out all parts and tools first, then assemble frames on the floor before lifting them upright.
1. Unpack, Sort, and Check Components
Open boxes carefully, group posts, beams, shelves, and hardware, and compare with the packing list before you start assembly.
- Check for bent parts or sharp edges.
- Replace damaged pieces before loading stock.
2. Build the Main Frame on the Ground
Connect uprights and base feet flat on the floor so frames stay square. Only then add cross‑braces and tighten bolts in stages.
| Step | Action |
|---|---|
| 1 | Attach feet to uprights |
| 2 | Add top beams |
| 3 | Install cross‑braces |
| 4 | Stand frame upright |
3. Install Shelves from Bottom to Top
Fit lower shelves first to add weight and stability, then move upward. Use a level at each tier to ensure products will sit flat.
- Leave extra space above bulky items.
- Lock safety clips fully into place.
🧱 Safe Anchoring Methods for Wall‑Mounted and Freestanding Units
Correct anchoring keeps shelves stable under heavy loads or customer contact. Follow the maker’s limits and hardware guidelines.
Use at least two anchor points per tall unit and more for long runs or high‑traffic zones.
1. Anchoring Wall‑Mounted Shelves
Drill into studs or solid masonry and use the proper anchors. Avoid hanging deep or heavy shelves from drywall alone.
- Mark stud positions along the wall.
- Use a level before tightening each bracket.
2. Stabilizing Freestanding Gondolas
For tall freestanding units, use base extensions, back‑to‑back joins, and floor anchors where needed to prevent tipping.
| Method | Use Case |
|---|---|
| Base extensions | Narrow aisles, tall shelves |
| Back‑to‑back link | Central gondola runs |
| Floor anchors | Heavy or uneven loads |
3. Safety Checks After Anchoring
Push gently on the top of each unit to test movement. Retighten bolts and anchors if you notice any rocking or sway.
- Inspect after large restocks.
- Recheck after floor cleaning or layout moves.
🧼 Maintenance, Inspection, and Upgrading with Formost Plastics Accessories
Routine care keeps metal display shelves safe, clean, and appealing. Regular checks also protect your investment over time.
Upgrade with smart accessories to improve product organization and support new categories or promotions.
1. Schedule Cleaning and Rust Prevention
Wipe shelves with mild cleaner, dry them well, and treat any scratches fast to stop rust from spreading under the finish.
- Use non‑abrasive cloths.
- Avoid harsh chemicals on coatings.
2. Inspect Fasteners, Braces, and Load Limits
Check bolts, clips, and braces each month. Remove overloads, and follow the maker’s rated capacity for every shelf and upright.
| Item | Check |
|---|---|
| Bolts | Tight, no rust |
| Braces | Not bent or loose |
| Shelves | No sagging under weight |
3. Upgrade Displays with Modular Accessories
Use adjustable racks and holders to refresh layouts quickly. For gaming zones, add a Modular Gaming Controller Display Stand – Custom Accessory Rack to improve shopper engagement.
- Clip‑on hooks for hanging goods.
- Bins and trays for small items.
Conclusion
Careful planning, solid preparation, and correct anchoring help your metal retail display shelves stay safe, strong, and attractive. Measure your space, check floors and walls, and follow step‑by‑step assembly guidelines.
With regular inspection and smart accessory upgrades, your fixtures can adapt to new product lines, boost visibility, and support a better in‑store experience for customers.
Frequently Asked Questions about display retail shelves
1. How much weight can metal retail display shelves hold?
Capacity depends on the model and materials. Always follow the maker’s rated load per shelf and upright. Place heavier items on lower levels to reduce tipping risk.
2. Do I need to anchor freestanding shelves to the floor or wall?
For tall or heavily loaded shelves, anchoring is strongly recommended. It reduces movement, prevents tipping, and is often required by safety standards or local codes.
3. How often should I inspect my shelves?
Inspect at least once a month, and always after major restocks or layout changes. Look for loose bolts, bent parts, rust spots, and signs of overloading.
4. Can I move installed shelves without disassembling them?
It is safer to unload products and move shelves in sections. Dragging loaded units can damage floors, weaken joints, and create serious safety hazards.
5. What is the best way to keep shelves looking new?
Clean regularly with mild detergent, avoid abrasive tools, fix chips quickly, and replace worn accessories. Good lighting and clear signage also help shelves look fresh and organized.