


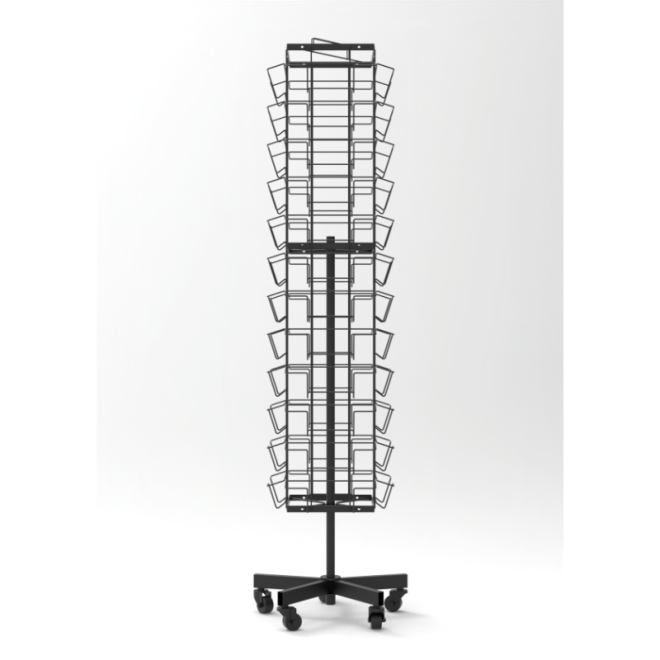
You bought sleek black display shelves, opened the box, and now you’re staring at 47 mystery screws, one tiny hex key, and instructions that look like modern art. Don’t worry—everyone’s shelves start as confusing floor decor.
This guide breaks assembly into clear steps, shows which piece goes where, and prevents wobbly disasters, following safe furniture setup advice from experts at the U.S. Consumer Product Safety Commission.
🧰 Preparing Tools, Hardware, and Workspace for Safe Shelf Assembly
Set up a clean, bright area before you start building your black display shelf. Gather all tools, check hardware, and plan a simple, safe workflow.
This makes assembly faster, prevents missing screws, and protects your floor and products. A smart setup also improves the final look of your display.
1. Basic Tools You Need
Use simple hand tools so assembly stays safe and controlled.
- Phillips screwdriver or bit set
- Rubber mallet for gentle taps
- Measuring tape and pencil
- Soft cloth or cardboard to protect floors
2. Sorting and Counting Hardware
Lay all screws, bolts, and brackets in small groups so you can see each size clearly and avoid mixing parts during assembly.
| Hardware | Use |
|---|---|
| Short screws | Fix shelves to brackets |
| Long bolts | Connect frame posts |
| Washers | Protect painted surfaces |
3. Creating a Safe Workspace
Keep walkways clear and remove loose rugs. Good lighting helps you see alignment marks and prevents mistakes.
- Work near a wall outlet if using power tools
- Store packaging away from the build area
- Keep pets and children at a distance
4. Planning the Display Purpose
Decide what you will show on your black display shelf before you assemble it. This guides shelf spacing and weight planning.
- Light items: brochures, postcards, cosmetics
- Medium items: books, folded clothes, decor
- Heavy items: boxed goods, equipment
📦 Unboxing, Identifying Parts, and Checking Your Formost Plastics Shelf Kit
Open the box carefully, avoid sharp cuts on panels, and place every part on a flat surface. Compare all pieces with the instruction sheet.
Check the finish, edges, and hardware count before starting. This helps you spot damage early and request replacements if needed.
1. Safe Unboxing Steps
Cut only the tape, not the panels, then slide parts out gently and keep foam or plastic for later protection during assembly.
- Open box from the top
- Remove loose hardware bags first
- Stack panels by size and shape
2. Identifying Panels and Posts
Match each shelf, upright post, and bracket to the diagrams. Many Formost Plastics kits use simple labels or stamped marks for easy sorting.
| Part | Label | Typical Use |
|---|---|---|
| Side posts | A | Main vertical support |
| Shelves | B | Product display surface |
| Cross braces | C | Back stability |
3. Checking Hardware Quantities
Use a quick visual count to confirm each hardware type. If anything is missing, pause and contact support before you start building.
4. Comparing with Other Display Options
Formost Plastics offers many display systems. Match your shelf kit with other fixtures to build a strong and flexible store layout.
- 4 Layer Hook Display Spinner Rack – Rotatable Commercial Hook Stand for Supermarket and Mall Use for hanging goods
- Greeting Card Display Rack – Postcard Display Stand for Supermarket and Mall Use for cards and small prints
- Vertical Multi-layer Catalog Rack – Multi Grid Magazine Newspaper Brochure Display Rack for Household and Mall Use for printed media
🪛 Step‑by‑Step Frame Assembly for Stable Black Display Shelves
Build the frame slowly and in order so the black display shelf stays straight, square, and ready to hold weight safely.
Always tighten parts in stages and check alignment after each major step.
1. Connecting Uprights and Base
Attach uprights firmly to the base rails on both sides. Keep the frame flat on the floor while tightening the first set of bolts.
- Insert bolts by hand first
- Use washers to protect the finish
- Leave a little looseness for later alignment
2. Adding Cross Braces
Fix back or side braces in a cross pattern to stop wobble. This step locks the frame square before shelves go in.
| Action | Effect |
|---|---|
| Install top brace first | Aligns uprights |
| Add lower brace | Reduces sway |
| Check diagonals | Confirms square frame |
3. Preparing Shelf Levels
Set bracket heights before lifting panels. Plan lower levels for heavy items and higher levels for lighter, eye‑level products.
- Mark heights with pencil
- Keep shelf gaps even for a neat look
- Leave enough room for lighting or signs
🔩 Securing Shelves, Tightening Fasteners, and Testing Overall Stability
Once the frame stands solid, fix each shelf, tighten every fastener, and test movement to confirm your black display shelf is safe.
A steady structure protects both products and customers.
1. Mounting Shelves on Brackets
Place each shelf panel on its brackets, center it, then add screws from below or behind so they stay hidden and clean.
- Start with the lowest shelf
- Use all screw points provided
- Recheck spacing after fixing
2. Final Tightening Sequence
Tighten bolts from the base upward. This pulls the frame into line and reduces twist. Avoid over‑tightening to protect the finish.
| Step | Area |
|---|---|
| 1 | Base connections |
| 2 | Mid‑height joints |
| 3 | Top frame and braces |
3. Stability and Load Testing
Push the shelf gently from different sides. If it rocks, adjust feet or add wall anchors before loading products.
- Add weight slowly from bottom to top
- Never exceed the rated load per shelf
- Check for any new wobble after loading
🎨 Positioning, Cable Management, and Cleaning Tips for a Polished Display Setup
Place your black display shelf where it supports traffic flow and visibility. Manage cables and dust to keep a modern, clean look.
A neat setup helps products stand out and supports strong retail or home presentation.
1. Smart Positioning and Lighting
Keep shelves slightly away from walls for cleaning and cable paths. Use soft, even light to reduce shadows on dark surfaces.
- Align with nearby fixtures
- Avoid blocking exits or aisles
- Test views from key entry points
2. Simple Cable Management
If you use LED strips, price displays, or screens, plan cable paths along uprights and under shelves so wires stay hidden.
| Tool | Use |
|---|---|
| Cable clips | Fix wires to posts |
| Velcro ties | Bundle extra length |
| Cable channel | Hide wires on walls |
3. Cleaning and Finish Care
Wipe black panels with a soft, slightly damp cloth. Avoid strong cleaners that can dull the finish or leave streaks.
- Dust weekly for a sharp look
- Clean spills at once
- Use coasters under metal decor
Conclusion
Assembling a black display shelf is simple when you prepare tools, verify parts, and follow a steady, step‑by‑step process. Careful setup improves safety and style.
Once built, smart positioning, clean cable routes, and regular care keep your display sharp and inviting, whether you use it at home, in a store, or in a showroom.
Frequently Asked Questions about black display shelf
1. How much weight can a black display shelf hold?
Always follow the maker’s load guide. As a rule, place heavy items on lower shelves, stay under the stated limit, and spread weight evenly.
2. Do I need to anchor my shelf to the wall?
Tall or narrow shelves should be anchored, especially in busy stores or homes with children. Wall brackets greatly reduce tipping risk.
3. How do I prevent scratches on the black finish?
Use soft cloths, add felt pads under decor, and avoid dragging metal items. Clean with mild soap and water, then dry with a soft towel.
4. Can I adjust shelf heights after assembly?
Most Formost‑style systems allow adjustment. Remove items, loosen bracket screws, move brackets to new positions, then tighten and re‑check level.
5. What makes black display shelves good for retail?
The dark color hides minor marks and makes products stand out. Black shelves also blend with many fixtures, giving a modern, unified look.